From now on the powerful Mail Merge feature will be even more useful: you can send encrypted PDF files directly from Collabora Office Writer!

A handy feature of Collabora Office Writer since long, is doing a mail merge that directly sends out PDF files. From now on you can make the PDF files encrypted, adding additional privacy option to your work. The feature will be available in Collabora Office 6.2-21 and 6.4, and has of course been pushed to the LibreOffice master branch as well. Thanks to Collabora for sponsoring this work and kudos for Gülşah Köse for doing the work. In this article we’ll show you how to set this up.
Mail merge preparations
Of course, you need to have done the usual preparations for mail merge. We’ll briefly show a few essential steps.
Set up the mail server
This allows you to directly mail the merged documents from Collabora Office.
- Open (a file in) Writer.
- Select Tools→Options → Collabora Office Writer → Mail Merge Email
And fill the fields like following (with your own information)
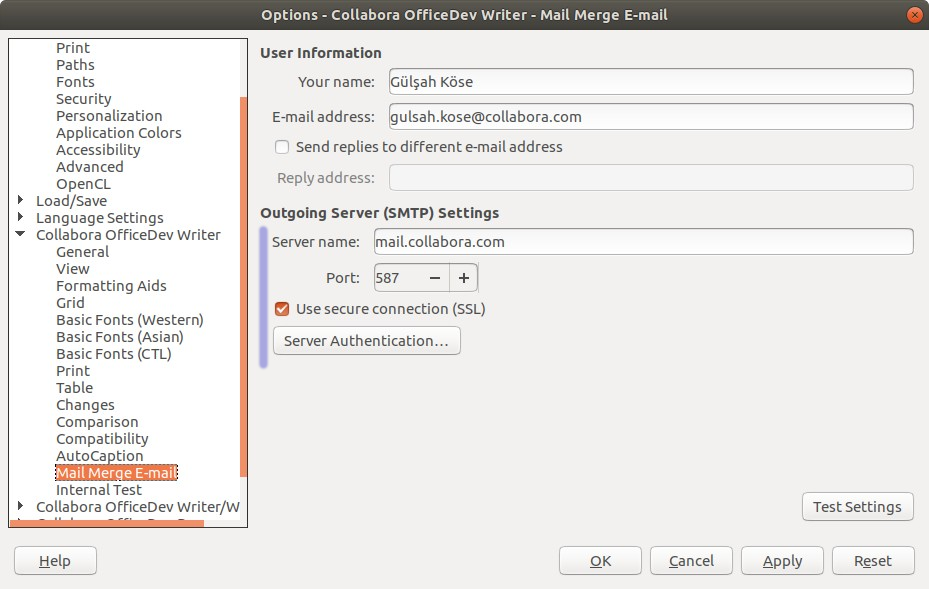
- Click the Server Authentication button and fill with your information and click OK.
If the first option is insufficient, then of course also fill in the other information.

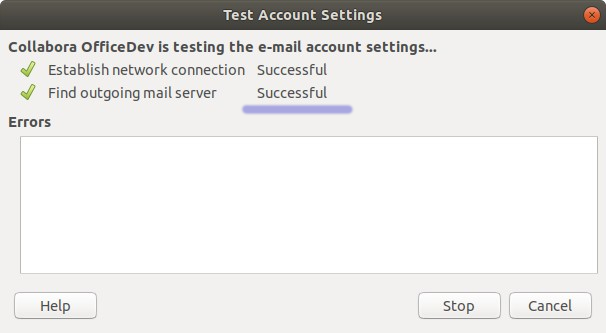
- From the Options dialog click the Test Settings button to see if your information is OK.
If so, you will see the following dialog. If not, check the information again.
- Click OK from the Options dialog. Then mail server should be set now.
Prepare the database / data source
Collabora Office can link to various data sources. In this case, of course an email address and a password to encrypt the PDF file must be provided by the database.
The simple table below, has fields / columns for emails and passwords.

You have to make sure that this data source is used.
- Chose Edit→ Exchange Database…
- Click View→Data Source to use that database in Collabora Office
Next steps are of course creating a template document with fields and content. It is not necessary that the email and password fields are in the template – you must select these later on.
Do the mail merge
- To send the document use Tools→Mail Merge Wizard or click the icon on toolbar.
![]()
- In the Wizard:
1. Select Use current document and click Next
2. Select E-mail message and click Next
3. Click “Select the address list”. Select your sheet from the menu and click OK.
4. Click “Finish”.
We are ready for sending documents.
- Click the “Send Documents” icon from the toolbar

Chose to save and send with password
As a last step, you will see the following dialog.
- Chose “Send as Adobe PDF”
- Then the password option will be available. Select it.
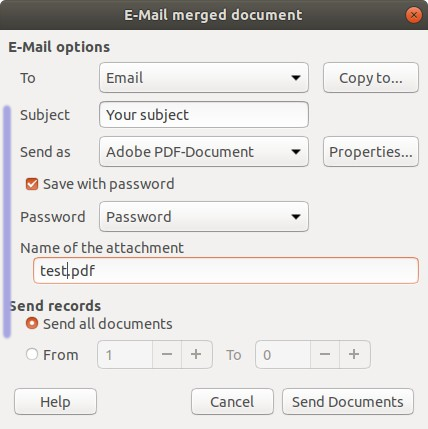
The password for each PDF file will be taken from the database of recipients, thus allowing the use of individual passwords.
- Click the “Send Documents” button and wait for the process to finish.
That’s all. We hope you like this. 🙂
Test Collabora Office
If you want to learn more about our long term supported Collabora Office 6.2 (supported until December 2022 at least) and its possibilities and advantages for your organization, get info and a demo here!